
You'll find your tasks in three places:
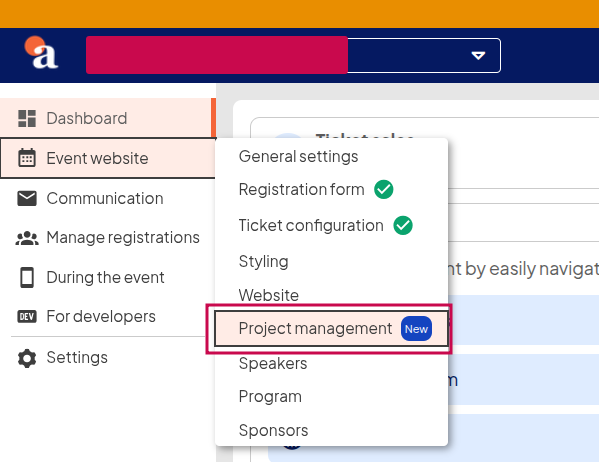
- In your event: open your event and choose Project management in the menu. Here you see all tasks for this event.
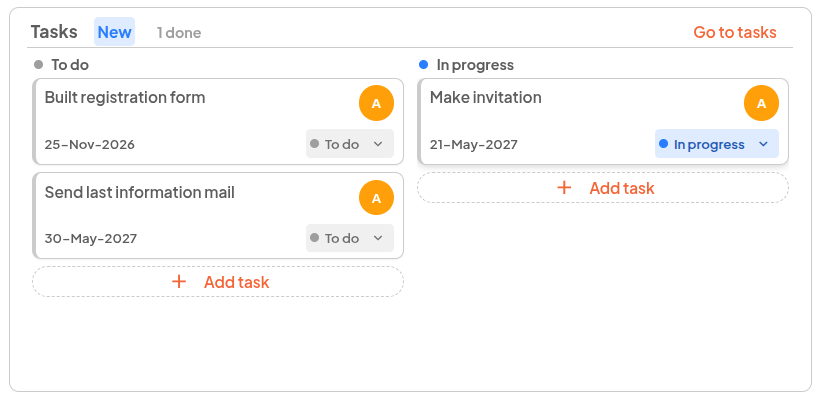
- On your event dashboard: the Tasks block shows your tasks in two columns, To do and In progress. At the top you see how many tasks are done. Click Go to tasks for the full overview.
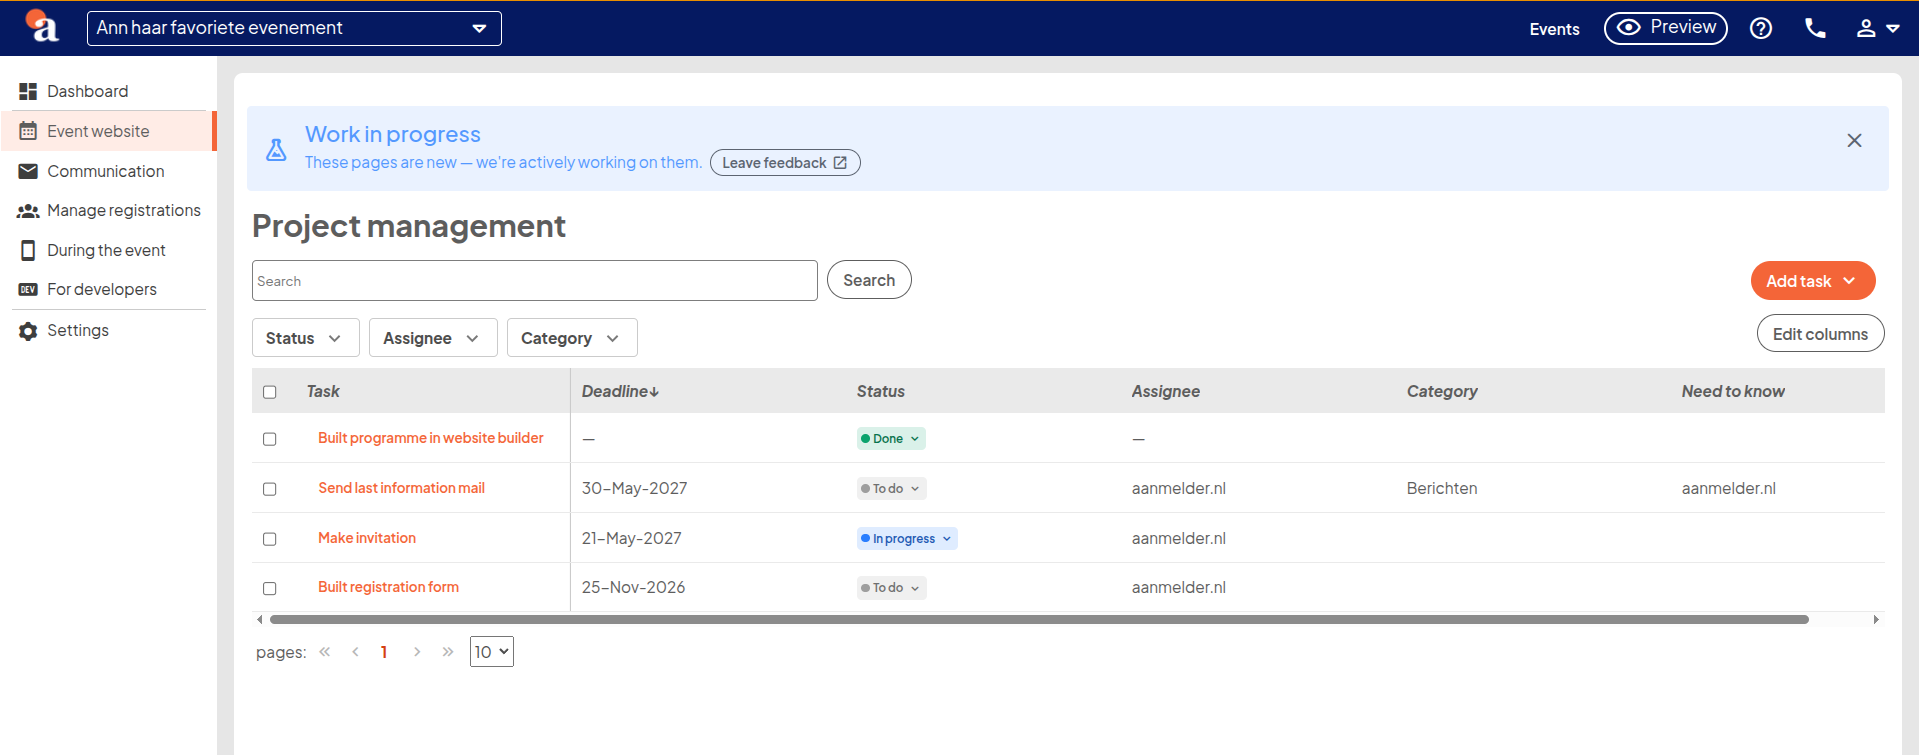
- At organisation level: your organisation menu also has Project management. Here you see the tasks of all your events together, with an extra Event column. Handy when you're preparing several events at once.
When you create a new event, we automatically add a set of supporting tasks. Each task links to the right page in aanmelder and gets a deadline counted from the first day of your event:
|
Task |
Deadline |
|
Add your event details |
56 days before the event |
|
Design your website |
49 days before the event |
|
Define the program |
49 days before the event |
|
Set up a registration form |
42 days before the event |
|
Test registration process before publishing |
35 days before the event |
|
Send invitations |
30 days before the event |
If you turn on payments when creating the event, you also get Set up tickets (42 days before the event). If you choose abstract handling, you also get Set up contribution form (56 days) and Invite reviewers (35 days).
Don't want this? Go to Project management in your organisation menu and turn off the switch Create tasks with items needed to prepare the event. New events will no longer get default tasks. Existing tasks stay where they are.
Adding tasksClick Add task. You can choose from three options.
Create a single task
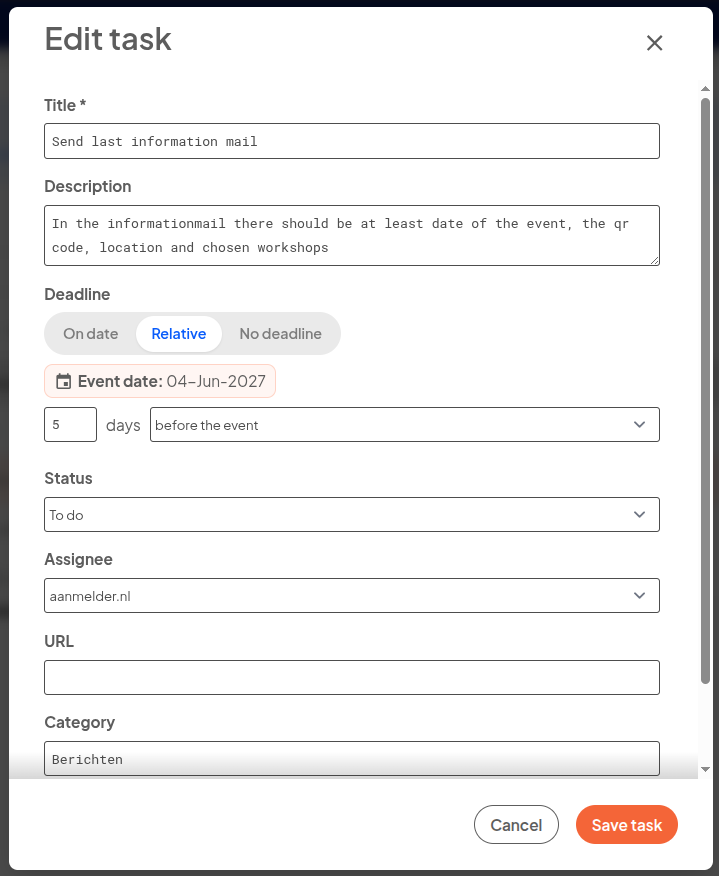
Choose Create task and fill in:
- Title (required): what needs to happen.
- Description: extra explanation or agreements.
- Event: only at organisation level; choose which event the task belongs to.
- Deadline: choose one of three options:
- On date: a fixed date.
- Relative: a number of days before the event or after the event. If your event moves, the deadline moves with it.
- No deadline.
- Status: To do, In progress or Done.
- Assignee: the colleague who picks up the task.
- URL: a link to a page that belongs to the task, such as a quote or a shared document. The link must start with http:// or https://.
- Category: your own label, such as Catering, Venue or Speakers. You can filter on category later.
- Need to know: colleagues who should be aware of the task without being responsible for it.
Click Add task to save.
On the dashboard it's even quicker: type a task name at the bottom of the To do or In progress column and the task is added.
Start from a template
Choose From template and select a template. In one click you get a complete task list with deadlines:
- Complete event (6 tasks): event details, website, program, registration form, test registration and invitations.
- Paid event (7 tasks): the same, plus tickets and payments.
- Conference with abstracts (8 tasks): the complete checklist, plus the contribution form and inviting reviewers.
Click Add tasks. You can then adjust or add to each task.
Reuse the tasks of a previous event
Do you organise the same event every year? Choose Import tasks, select the previous event and click Import tasks. All tasks are copied, with the same assignee. Each task's status is set back to To do. If you used relative deadlines, they're automatically counted from the date of your new event.
You can only import tasks from events within the same organisation.
Keeping track of tasksThe overview shows each task's Deadline, Status, Assignee, Category and who is Need to know. Tasks are sorted by deadline by default.
- Colour-coded deadlines: a deadline within two weeks is shown in orange, a deadline within a week in red. Tasks that are done get no colour.
- Change the status: click a task's status and choose To do, In progress or Done.
- Search and filter: search on title or description, or filter on status, assignee and category. At organisation level you can also filter on event.
- Several tasks at once: tick the tasks and choose Update status, Update assignee or Delete task.
Click a task's title to see all its details. There you can:
- edit the task with Edit task;
- add notes to the task with Notes, for example to record agreements with your team;
- create a similar task with Copy task;
- pick up the task with Assign to me;
- delete the task with Delete task. This can't be undone.
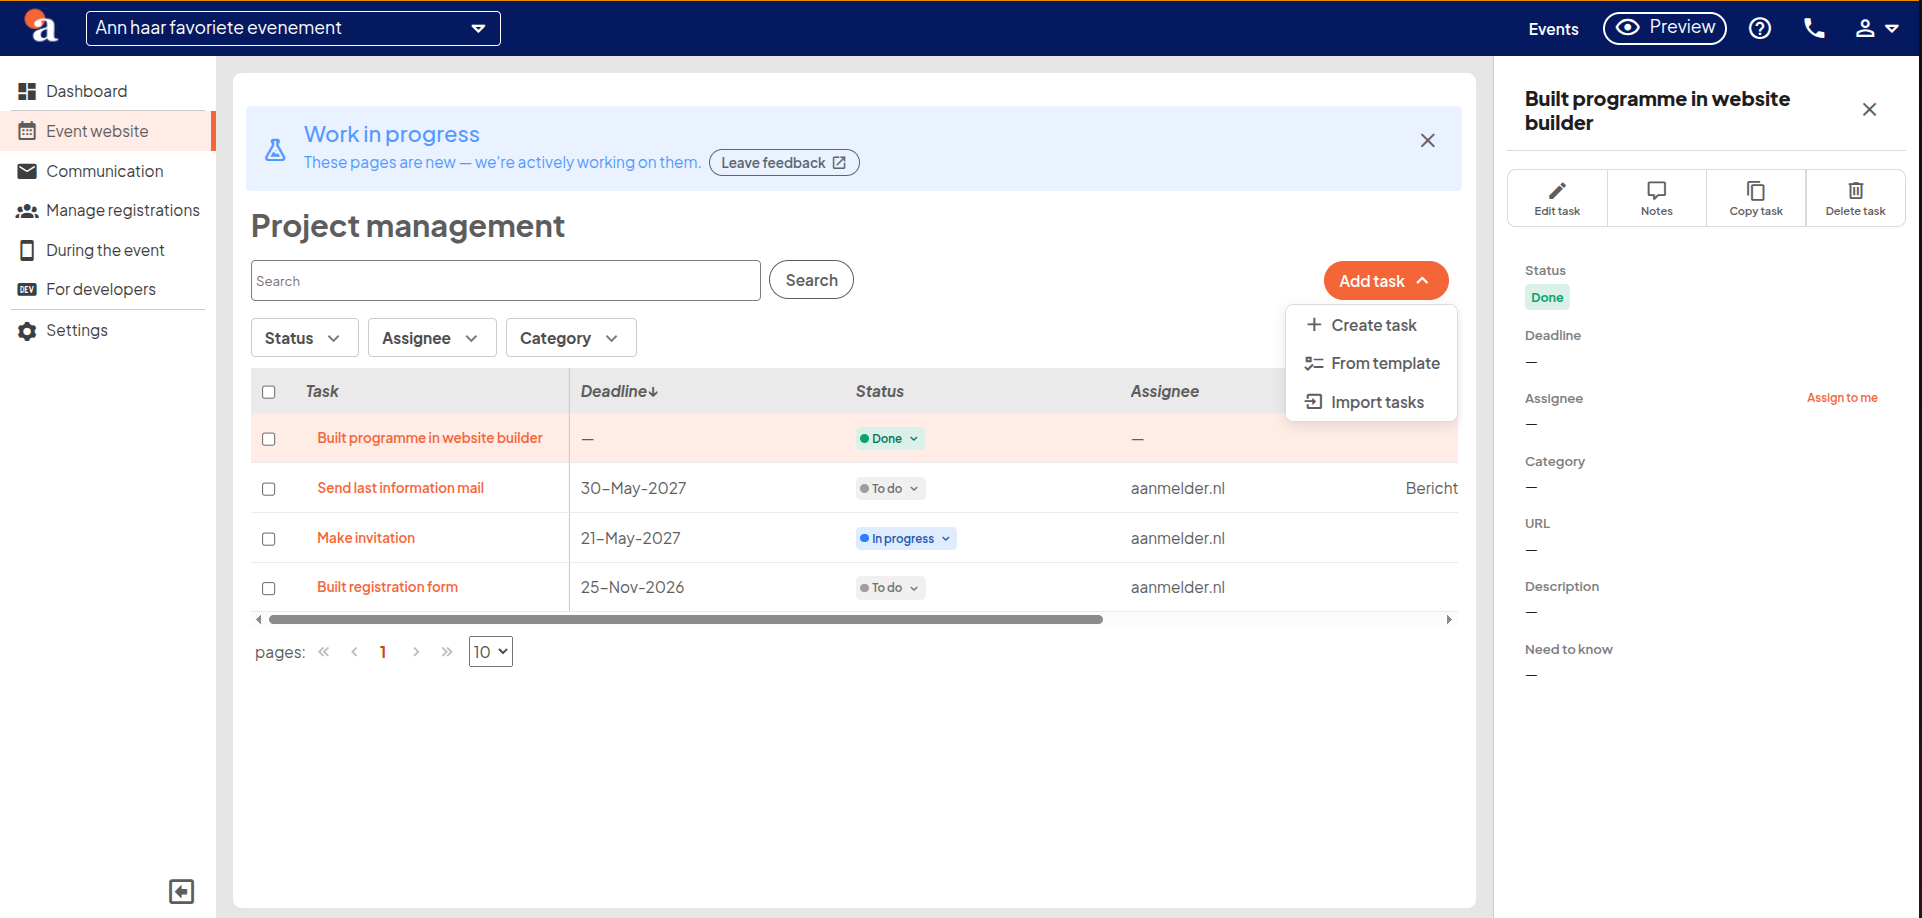
You can assign tasks to anyone with access to your organisation, so everyone on your team sees right away who's working on what. Filter on Assignee to see only your own tasks.
Whether you can create, edit and delete tasks depends on your role. Anyone with access to the event can change a task's status. That way a colleague can mark a task as Done, even if they can't change anything else in the planning.
Tips- Use relative deadlines. If your event moves, your whole planning moves with it.
- Use a category per area, such as venue, catering and communication. That way you quickly filter on what you or a colleague is handling.
- Build on your best planning. Import the tasks of your previous edition and start with a list that has already proven itself.