When your event has reached its registration limit, the waiting list feature allows interested parties to leave their details. When a spot becomes available, the first person on the waiting list automatically receives a message. Through this message, this participant can still register for your event.
As the organiser, you have full access and control over the waiting list. This way you can prioritise or remove participants. The participant can also withdraw from the waiting list.
In this guide, you can find out how to set up the waiting list (phase 1), how to manage the list of people waiting (phase 2) and how communication concerning the waiting list is done (phase 3).
Phase 1: Setting up the waiting list
- Go to the website settings of your event and view settings under the heading 'Registration and website accessibility.'
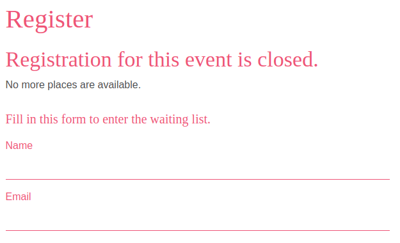
- Enter the maximum number of participants and you will get the option to create a waiting list. Here you can also enter a maximum number of people. When the maximum number of participants including the waiting list is reached, visitors to your event website will see on the registration form 'this registration is closed, no more places are available.

-
Determine the expiration time. This is the time that a wait listed person has to register as soon as a place becomes available, after being notified.
This is what will be shown n your registration form when you have reached the maximum amount of participants and the waiting list is activated:
Phase 2: Manage list of wait listed people
If you go to the dashboard under the heading registrations, you will see the waiting list. Here you will find all the people who have signed up for the waiting list. If a place becomes available, the first person on the waiting list will receive an e-mail.
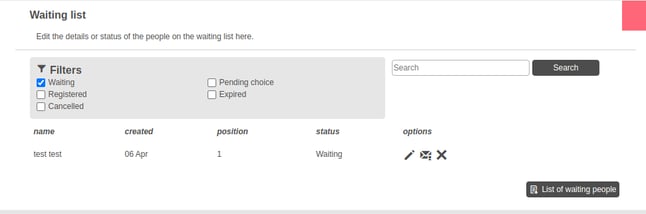
As an organizer you can edit the list. This is done with the different icons under options:
 With this icon you can edit the information of the person on the waiting list.
 With this icon you can view the messages the person on the waiting list received.
 With this icon you can remove a person from the waiting list. You will then see this person under the filter 'cancelled' and with the back arrow you can put this person back -in the same position- on the waiting list. Good to know is that you can increase or decrease a persons position on the waiting list with the up or down arrow.
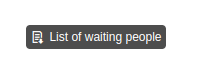
At the bottom of the list you can also export the waiting list by pressing
Phase 3: Communication and messages concerning the waiting list
If the maximum number of participants is reached, the waiting list is automatically activated and interested parties will see the following.
Making a waiting list for your events
The confirmation message that a person is added to the waiting list is automatic and looks like this:
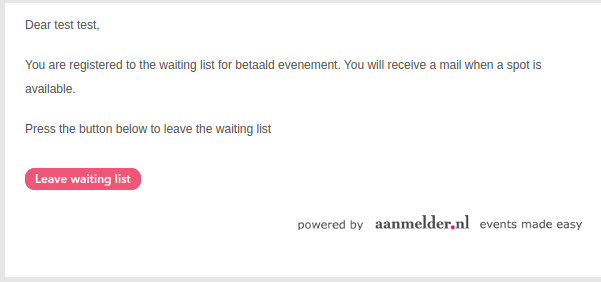
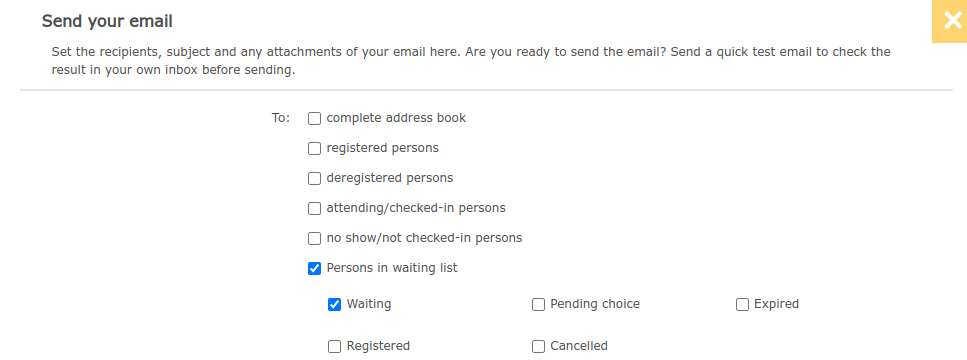
The person waiting also has the option to leave the waiting list. You can also undo this once you have clicked on this. From the message center on your dashboard, you can send mails to a certain group or filter from the waiting list.
In the message center, you can set up more communication in addition to the automatic messages, also for the group of waiting people. Below you can see where you can tick this option.
You can find out how to creating messages, here.