When a registration is completed, the participant receives an automatic confirmation message. You can change the text of this message as follows:
- Go to Dashboard > Communication > E-mail settings.
- Go to Confirmation message. The text written here is our standard confirmation message but you of course can change the default text.
![]() Tip: In the extra options you can switch to our new mail template builder
Tip: In the extra options you can switch to our new mail template builder
Extra options
You will find more options in the settings by clicking on the settings wheel on the bottom right corner:
- convert to the new mail template builder
- send a copy of the confirmation message to yourself or another e-mail address
- add a X and Facebook button to the confirmation message
- add a QR code to the confirmation message
- add a Google Wallet or Apple Wallet link
- add a calendar link to the confirmation message.
 Tip
Tip
For example, the QR code is used at the Event Check-In or the check-in of sub sessions at your event.
Tip
In the standard message you see "0" and "" and "". Through aanmelder.nl these words will change into respectively: the name of the participant, the name of the event and the name filled in at sender settings. More information can be found in the article Automatic replacements.
Tip
In the confirmation message you can show the participant's answers from the registration form, for example a workshop choice.
You can do this in the following way:
- In the dashboard go to Registration form
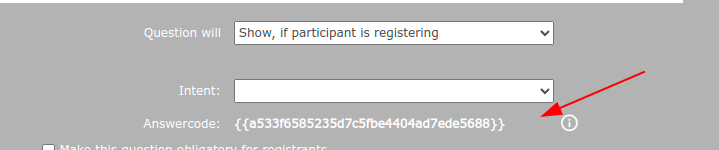
- Click on the wheel icon of the question in question
- Copy the answer code, including the double braces/brackets.
- Go back to your dashboard and go to E-mail settings.
- Paste the answer code into the confirmation message where you want participant's answer to be shown.
Note! The answer code in the confirmation message only shows the given response, not the question text from the form.
 Tip
Tip
You can see an overview of all the messages sent to the participant, including the confirmation message. You can also resend these messages to the participant.
Go to Dashboard > Manage registrations > registrations > overview. Under options on the right side of the participant's name, click on the envelope. 
You will then get an overview of the message, the subject and the date it was sent. Click on the envelope to resend the message to the participant.
